
Difficulty: Moderate
Directions:
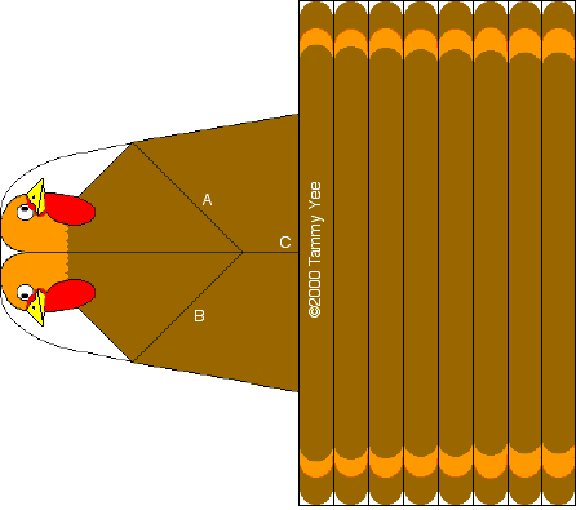
1a.
Print and cut out origami along outer solid lines.
1b. Snip end of feet, as illustrated, to black dot.
2a. Turn paper over. With printed side facing
down, fold along line A as illustrated.
2b. Repeat fold along line A on opposite side.
2c. Fold along line B.
2d. Repeat fold along line B on opposite side.
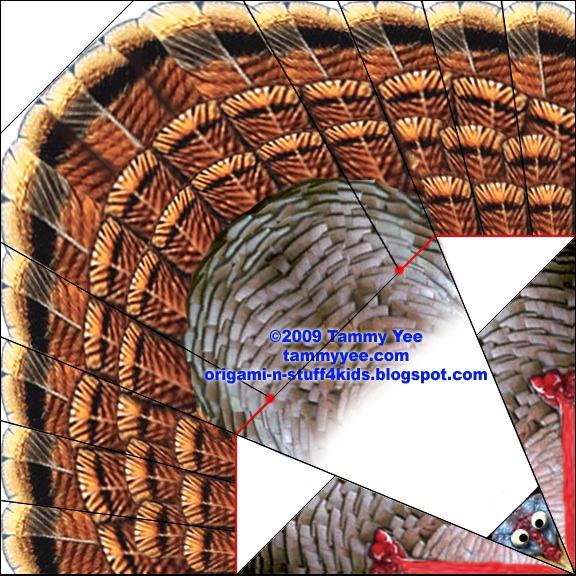
3a.
Unfold along your last fold (see 2d). Your "crease" along line B is indicated by the green dashed line. Take note of line C, as indicated by the red solid line.
3b. Unfold along line A. Your origami should appear as illustrated, with the creases as marked by colored lines. (Note: Red line C is not creased yet; the line is marked for your convenience)
4a. Now fold along
B line first...
4b. Then fold over along
A line, all the while creasing along line
C (marked in red) to create the chick's wing.
4c. Repeat above directions on the opposite side to create the other wing. Your origami should now appear as shown.
5a. Fold back along line D.
5b. Fold beak up along line E.
5c. Crease head by folding back along line F.
Unfold along line F only.
6a. Fold back along center line.
6b. Crease both ways along line
G by first folding forward,
6c. Then folding backward.
6d. Your origami should now have creases along line F (green) and line G (red).
7a. Simultaneously valley fold along line G (red) and mountain fold along line F (green)...
7b. So that your chick appears as shown.
8a. Valley fold along line H.
8b. Fold inward along line I on both sides to create legs.
8c. Fold feet forward, and your chick is pau (done)!
Happy Easter!
©2010 Tammy Yee
All rights reserved.


